Formatted Feedback
Autograding feedback plays an important role in a student's Autolab experience. Good feedback provided by autograders can really enhance a student's learning. As of Summer 2020, Autolab includes the formatted feedback feature by Jala Alamin. The feature was originally introduced in Washington State University Vancouver's version of Autolab.
Using formatted feedback requires a prior understanding of how Autolab's autograders work, as per the Guide for Lab Authors. The formatted feedback feature is an optional extension of the default feedback. It comes in a staged fashion, allowing differing levels of adoption.
The next few sections are meant to be read in order, with each following section introducing a more complex usage of the formatted feedback feature than the previous. Experimenting with the hellocat example code is another way to familiarize with the formatted feedback.
Default Feedback
By only outputting the autoresult (autoresult is the JSON string that needs to be outputted on the last line of stdout, as mentioned in the Guide for Lab Authors), the default feedback format will automatically be used.
{ "scores": { "Correctness": 20, "TA/Design/Readability": 40 } }
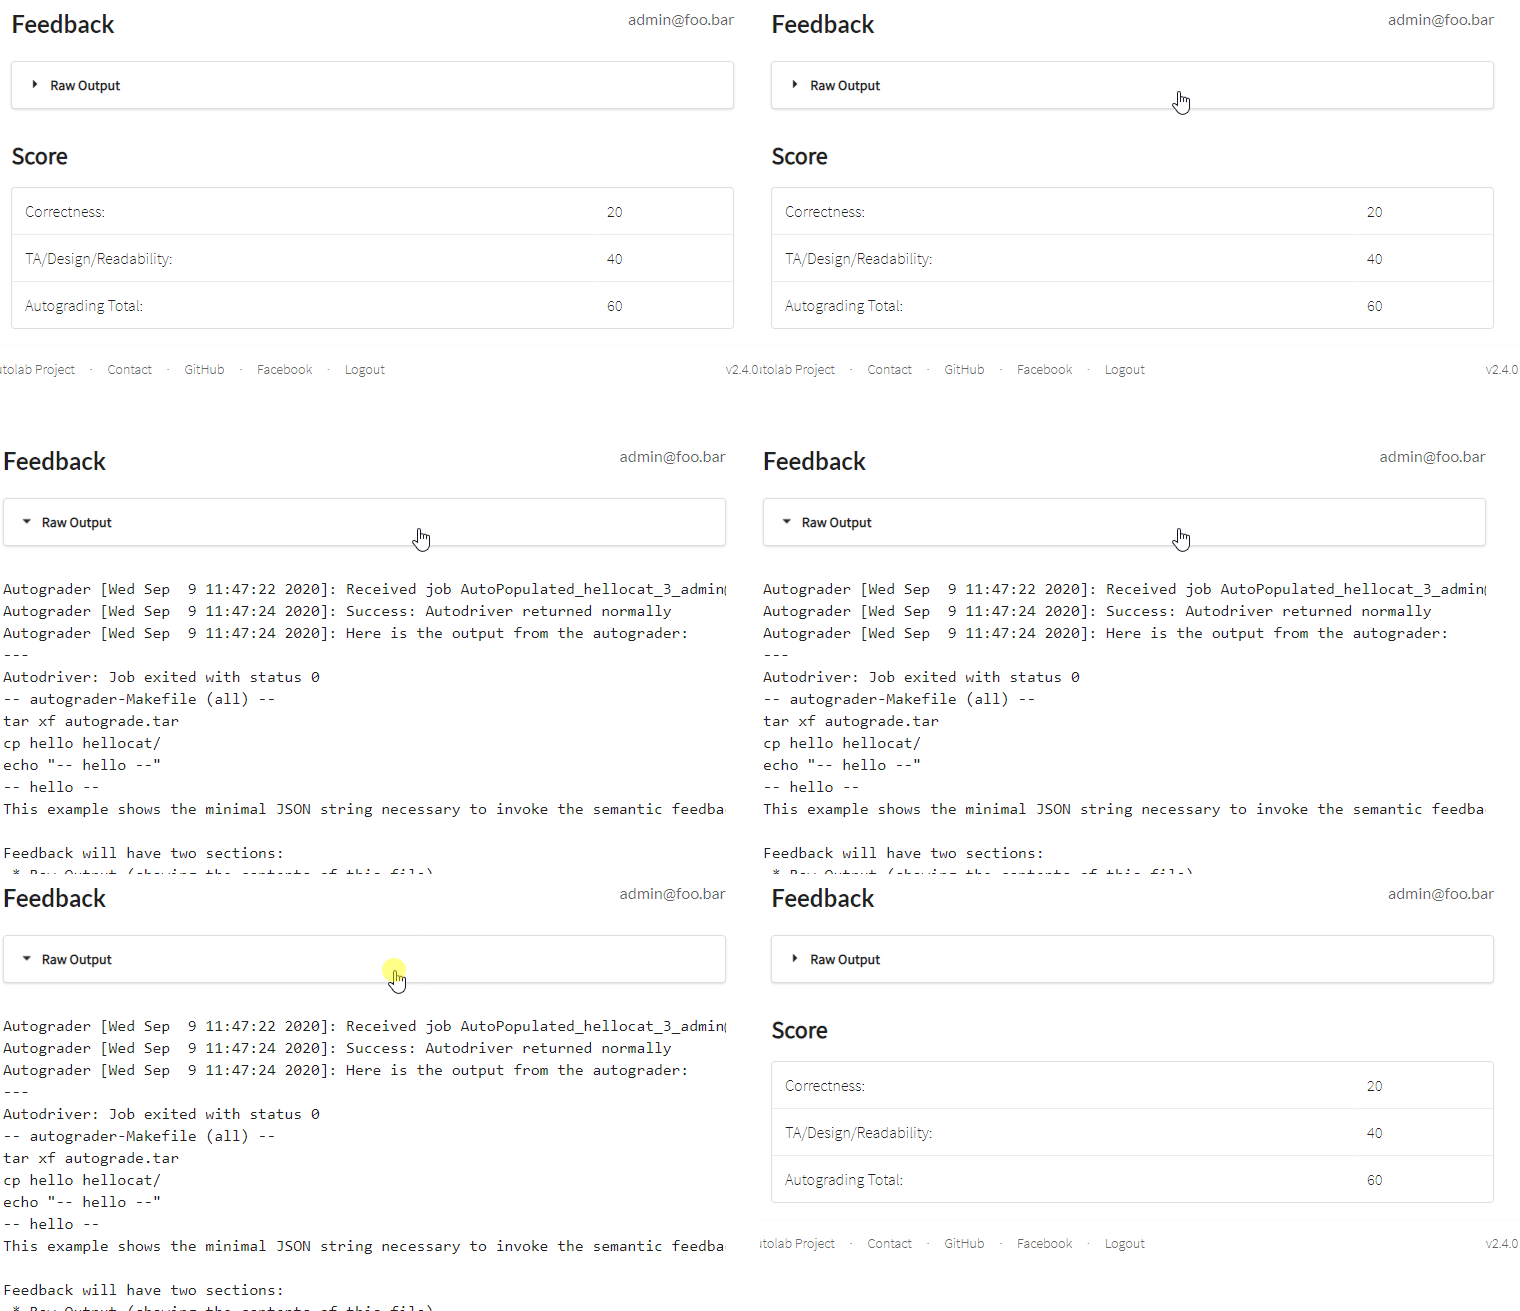
Autolab will simply display the raw output as produced by the autograder

Semantic Feedback (Minimal)
By adding an additional JSON string before the autoresult, as follows
{"_presentation": "semantic"}
{ "scores": { "Correctness": 20, "TA/Design/Readability": 40 } }

Semantic Feedback with Test Cases
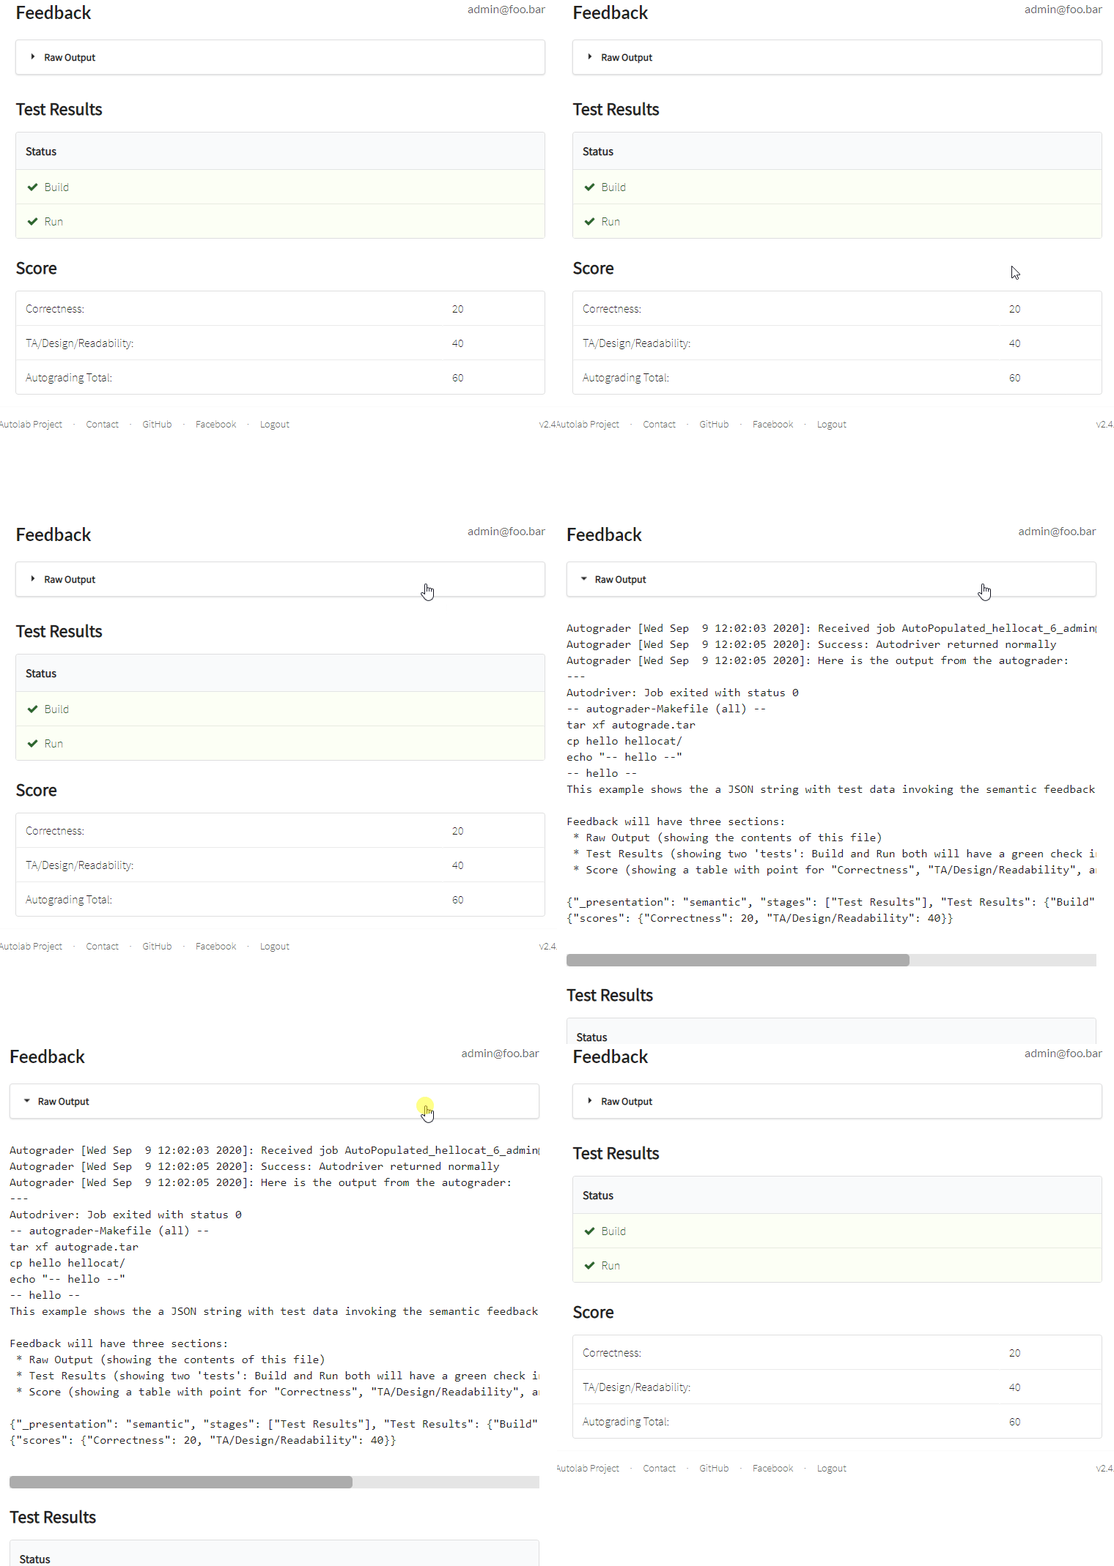
By further describing the additional JSON string, we can introduce test stages to the formatted feedback, which we can use to indicate to the student the test cases that have passed and/or failed.
Actual JSON to be outputted
{"_presentation": "semantic", "stages": ["Test Results"], "Test Results": {"Build": {"passed": true}, "Run": {"passed": true}}}
{"scores": {"Correctness": 20, "TA/Design/Readability": 40}}
{
  "_presentation": "semantic",
  "stages": ["Test Results"],
  "Test Results": {
    "Build": {
      "passed": true
    },
    "Run": {
      "passed": true
    }
  }
}
{"scores": {"Correctness": 20, "TA/Design/Readability": 40}}
["Test Results"] to the stages key. Then we would add to the corresponding Test Results key an object containing all the test case results. In this case Build and Run were used, but you can use other names for the test cases as well.

Semantic Feedback (Multi-Stage)
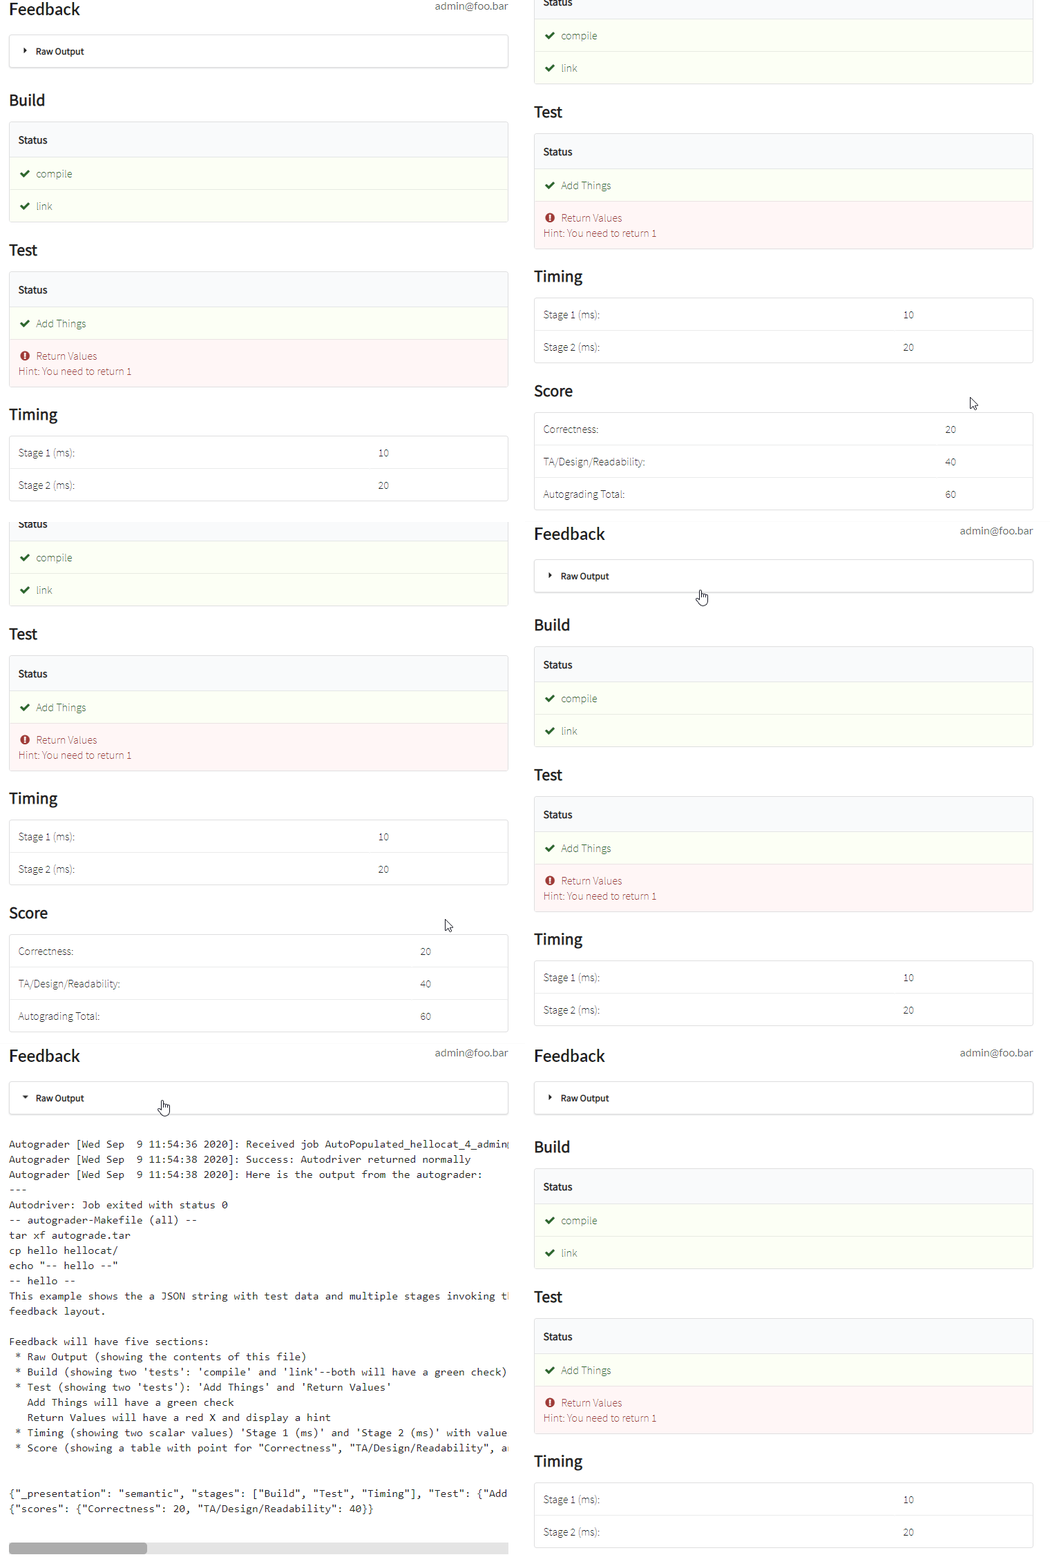
Using the same manner in which we add a Test Stage in the previous section, we can adapt it to create as many stages as we want. The following example has three different stages, namely Build, Test and Timing, but you can use other names for the stages as well.
Actual JSON to be outputted
{"_presentation": "semantic", "stages": ["Build", "Test", "Timing"], "Test": {"Add Things": {"passed": true}, "Return Values": {"passed": false, "hint": "You need to return 1"}}, "Build": {"compile" : {"passed": true}, "link": {"passed": true}}, "Timing": {"Stage 1 (ms)": 10, "Stage 2 (ms)": 20}}
{"scores": {"Correctness": 20, "TA/Design/Readability": 40}}
Prettified JSON (for reference only)
{
  "_presentation": "semantic",
  "stages": ["Build","Test","Timing"],
  "Test": {
    "Add Things": {
      "passed": true
    },
    "Return Values": {
      "passed": false,
      "hint": "You need to return 1"
    }
  },
  "Build": {
    "compile": {
      "passed": true
    },
    "link": {
      "passed": true
    }
  },
  "Timing": {
    "Stage 1 (ms)": 10,
    "Stage 2 (ms)": 20
  }
}
{"scores": {"Correctness": 20, "TA/Design/Readability": 40}}
We would add the stages we want into the stages array. Then we would add those corresponding stages as a separate key, with each of them holding their own set of test case results. We are also able to provide hints if the student gets the particular test case wrong by adding a hint key to the test case.
