Autolab Command Line Interface
To help showcase the capabilities of the API, we developed autolab-cli: A first-party command line client that serves as both a practical tool for users of Autolab, as well as a reference design for developers intending to use the API in their own programs. The cli includes features like downloading and submitting assignments from the terminal, viewing problems, and getting submission feedback.
Note to CMU Students:
This cli binary has already been installed on the andrew machines as autolab.
Obtaining authorization
Make sure you have the cli installed by running autolab in your terminal. If you see the usage instructions you're good to go. Otherwise, ask your school admin to install the cli from the Autolab CLI Repository.
To setup autolab-cli with your Autolab account, run autolab setup. This will initiate a manual activation.
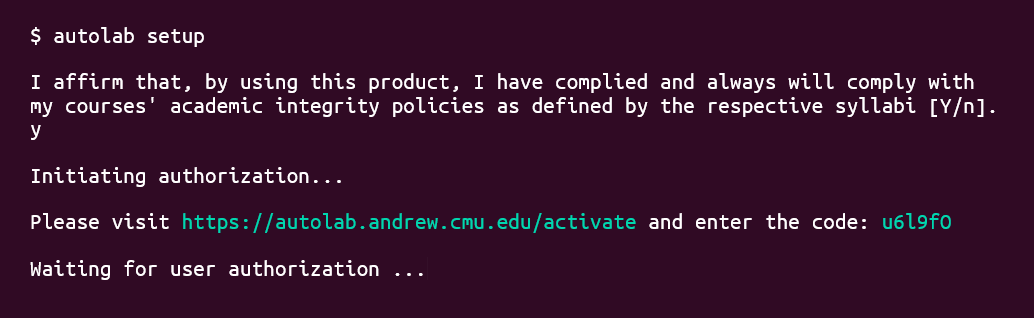 What you'll see when you run
 autolab setup
Once you approve the client on the Autolab website, the client will respond telling you that authorization was successful. You should be able to use the client from now on. If at any point you want to reset the client, run autolab setup -f and you'll be asked to re-authorize the client from a clean state. To deauthorize any client that you've given permission to, look at how to Manage Authorized Apps.
Viewing your courses and assessments
To view your current courses, run
$ autolab courses

This will show you a list of ongoing courses in the form unique_name (Display name). You should use the 'unique_name' of each course when interacting with autolab-cli.
To view the assessments of a course, run
$ autolab asmts <course_unique_name>
This will show you a list of assessments in the same unique_name (Display name) format.
Downloading an assessment
To start working on an assessment, go to a directory where you usually put your work, and run
$ autolab download <course_unique_name>:<asmt_unique_name>
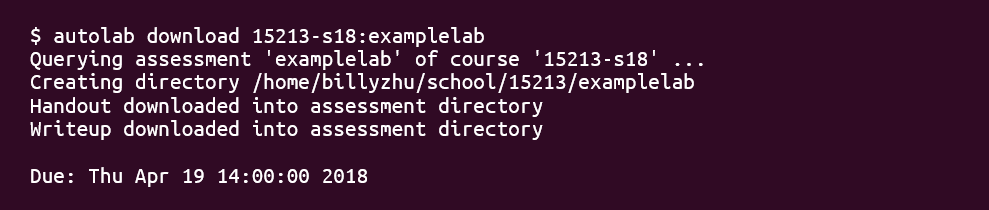
This will create a directory with the assessment name in your current directory, and download the handout and writeup in it. This new directory is called an 'assessment directory'. Whenever you're inside an assessment directory, autolab-cli will respond according to the context.
For example, when you're inside an assessment directory, you can run
$ autolab problems
This will show you the problems of this assessment.
Submitting solutions
To submit to an assessment inside an assessment directory, run
$ autolab submit <filename>

Yep, it's that easy.
Viewing scores
To view the scores you got, run
$ autolab scores
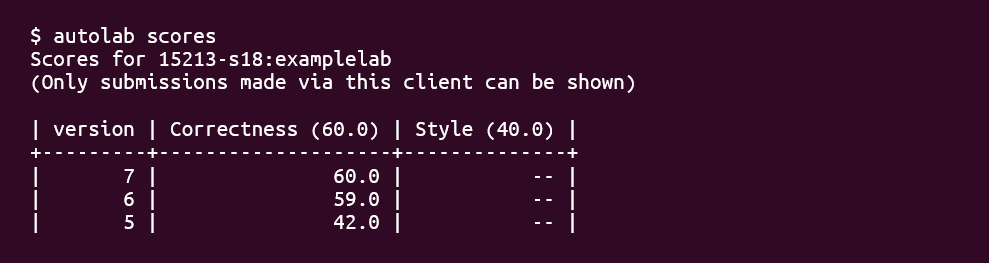
The scores command will only return scores for those submissions that are made via this client. This is a privacy constraint of the Autolab API.
To view the feedback you got, run
$ autolab feedback
Advanced features
You can learn more about each sub-command by running
$ autolab <sub-command> -h
This will reveal other flags you may be able to use with each command. For example, you can call all of the context-dependent commands outside of an assessment directory by providing the <course_unique_name>:<asmt_unique_name> pair.
We hope this speeds up your workflow! If you find any problems, please file an issue on the Autolab CLI Repository.